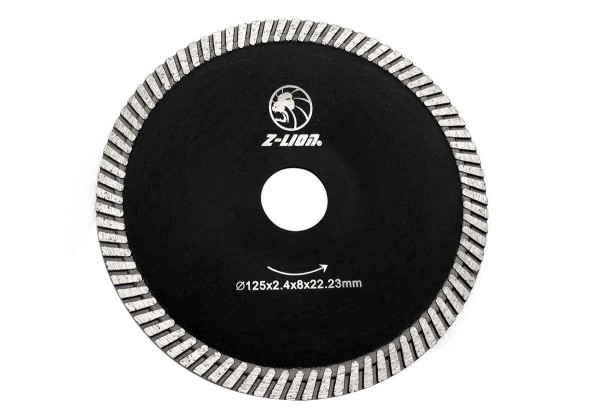
Tile cutting and precautions to share with everyone
When decorating a house, ceramic tiles are a very important part. Sometimes to make the ceramic tiles show a more perfect effect, we need to cut the ceramic tiles strictly according to the relevant dimensions. However, ceramic tile cutting is a technical job. Not only must it be cut accurately, but the cuts must also be precise. To maintain adequate smoothness, what is the standard method for cutting ceramic tiles? What issues need to be paid attention to during the cutting process?
Standard cutting method for ceramic tiles
As the demand for stylish and durable tiles continues to soar, mastering the art of precise and efficient tile cutting is critical for both experienced professionals and DIY enthusiasts alike. Implementing standard cutting methods is the fundamental cornerstone of achieving accurate tile cutting and ensuring a seamless installation. Here, we provide a detailed step-by-step guide to standard cutting methods for ceramic tiles, clarifying the techniques and procedures necessary to achieve perfect results.
Step 1: Tool Preparation
Embarking on your tile-cutting journey requires careful preparation of tools. Having a cutter and saw blade suitable for tiles is an essential prerequisite for successful cutting.

Step 2: Position the Tiles
During the initial stages of the cutting process, special attention is paid to the precise positioning of the tiles. This involves utilizing a moving ruler to select the desired cut size and aligning the tiles to the baseboard to ensure optimal accuracy and alignment.
Step 3: Start Cutting Program
The operator holds the cutter handle tightly, pulls the cutter wheel back, and begins the cutting process. The cutter wheel is then strategically manipulated to etch continuous and even straight lines across the tile surface, marking a critical stage in the process.
Step 4: Complete the Cutting
After ensuring a continuous and even straight line, the operator performs the final motion to complete the cut. Gently press and slightly lift the operating handle, and apply appropriate force to achieve the desired effect, the tiles effortlessly break along the designated line, effectively completing the cutting process.
Why does porcelain fall off when cutting ceramic tiles?
The intricacies and challenges in the field of tile cutting have become paramount as workers and hobbyists often encounter issues with porcelain peeling off or cracking during operations. A deeper analysis revealed that the root cause of this obstacle lies in the difference between the high hardness of the ceramic tiles and poor tool selection or improper operating techniques.
Ceramic tiles are very hard, which can cause huge challenges if you use inappropriate tools or improper operating methods, leading to a series of problems such as porcelain falling off and accidental breakage. This dilemma highlights the critical importance of implementing precise measures and utilizing specialized equipment to effectively cope with the complexities of the tile-cutting process.
To combat common challenges, experts and practitioners advocate judicious tool selection to reduce the risk of breakage of porcelain. Special electric cutters play an integral role as a primary solution, providing a tailor-made method to seamlessly cope with the intense hardness of the tiles while preventing potential breakage or detachment. It is also important to acknowledge that manual cutting methods are a viable alternative that allows for meticulous precision and control during the cutting process. This hands-on approach encourages first drawing a cutting line on the back of the tile with a knife, an important preparatory step that sets the stage for subsequent stages. Once the tile is turned over, the final step to perform involves placing your hands on both ends of the tile and applying just the right amount of force to create a clean break that will ultimately create the desired shape. The significance of this comprehensive analysis highlights the urgent need to address the challenges of porcelain peeling and cracking during tile cutting, emphasizing the critical role played by appropriate tools and precise operating methods.
Precautions for cutting ceramic tiles
When cutting tile, the following key precautions are vital to ensure a successful and long-lasting installation. Here are five points to consider:
Draw lines evenly and continuously on the surface of the tile in preparation for subsequent cutting.
Before starting construction, let the tile products soak in water for half a day to ensure that there are no bubbles on the tile surface. Kitchens and bathrooms need to be sloped to prevent water accumulation in the future. If accidental damage occurs during operation, the waterproof layer must be waterproofed again. After the floor tiles are laid, the tile surface must be covered with cardboard and left for 24 hours before walking on the surface.
Avoid using excessive force during cutting as this can cause a jagged shape and affect the life of the cutter.
When encountering supports such as wires and bathroom equipment during operation, the bricks should be cut and assembled as a whole, and no collage is allowed.
It is crucial to remove any remaining stains from the surface of the tiles immediately one hour after the tile construction is completed. After 4 hours of bonding, the grout becomes difficult to clean, and the bricks must be cleaned 12 hours after construction. Any voids discovered during inspection must be resurfaced immediately.
-
Online service
-
Official wechat
account
-
QQ:40933769
-
E-mail:
sales@z-lion.com
Online service
Please feel free to give your inquiry in the form below. We will reply you in 24 hours.

