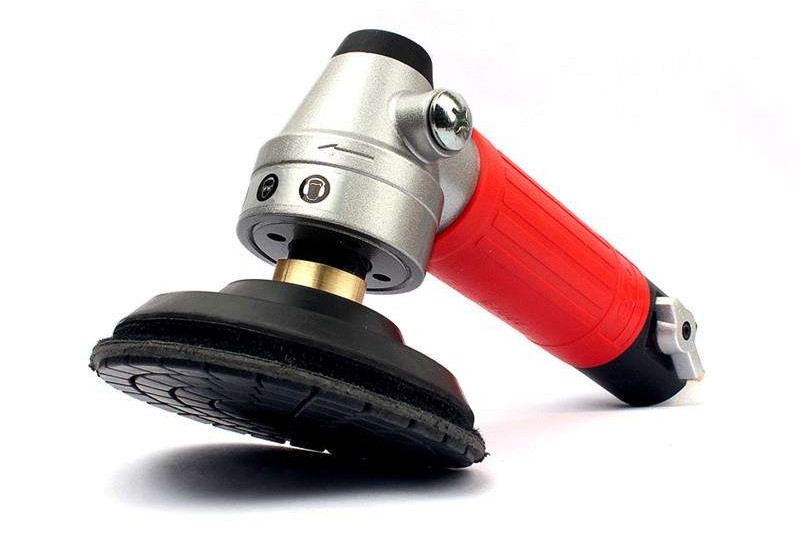
Tips for installing polishing pads and polishing with an angle grinder
When used with an angle grinder, a polishing pad is an important tool in achieving a smooth, shiny finish on stone surfaces. Proper installation and use of these pads are essential for effective polishing and avoiding damage to tools and workpieces. This article provides a step-by-step guide to installing a polishing pad and provides tips for effective polishing with an angle grinder.
Steps to Install Polishing Pads

1. Preparation
Check the polishing pad: Inspect the polishing pad for any signs of damage, such as tears or excessive wear. Make sure it is suitable for the material you will be working with.
Clean the polishing pad: Check the angle grinder's polishing disc to make sure it is clean and intact. Remove any debris or dust that may interfere with the installation or performance of the polishing pad.
2. Install polishing pads
Place the polishing pad: Place the polishing pad on the polishing disc of the angle grinder. Make sure it is properly aligned.
Tighten the nut: Firmly tighten the nut that holds the polishing pad in place. Make sure it is firmly attached to prevent it from coming loose during operation.
Front and back direction: For round polishing pads, please note the front and back. Only the front side is designed for polishing, so make sure the right side is facing out.
3. Connect power
Plug in angle grinder: Insert the plug into a suitable electrical socket.
Power on: Turn on the power to the angle grinder and make sure you are in a safe position to start polishing.
4. Adjust the speed of the polishing machine
See polishing pad instructions: Check the specifications that come with your polishing pad to determine recommended speed settings.
Choose the appropriate speed: Generally, higher speeds are suitable for polishing harder materials, such as metal, while lower speeds are suitable for polishing softer materials, such as stone. Adjust the angle grinder's speed setting accordingly.
Tips for Installing Polishing Pads on an Angle Grinder
1. Choose the right polishing pad
Power supply precautions
High-power angle grinder: These tools often require specialized polishing pads to handle the increased torque and speed. Using the correct pad ensures optimal performance and prevents damage.
Low-power angle grinder: For low-power models, standard polishing pads can be used directly. Make sure the pad is compatible with the grinder's specifications.
Material selection
Material compatibility: Choose a polishing pad made from a material suitable for the surface you want to polish. For example, diamond polishing pads are great for hard surfaces like granite and concrete, while softer polishing pads may be better for more delicate materials.
Coarseness and fineness: Polishing pads come in a variety of grit sizes, from coarse to fine. Choose the appropriate grit size based on the level of polish required. Coarse polishing pads are suitable for initial grinding, while finer polishing pads are used to achieve a high-gloss finish.
2. Install polishing pads
Remove the original grinding wheel
Removing the grinding wheel: Carefully remove the existing grinding wheel from the angle grinder. Please follow the manufacturer's instructions for proper disassembly.
Install polishing pads
Place the polishing pad: Place the polishing pad on the polishing disc of the angle grinder. Make sure it is properly aligned.
Secure the polishing pad: Tighten the nut to secure the polishing pad in place. Make sure it is compacted properly to prevent it from loosening during operation.
3. Pay attention to safety
Wear protective equipment: Always wear safety glasses and gloves to protect yourself from dust, debris, and potential accidents. The use of dust masks is also recommended, especially when working with materials that produce fine particles.
Check work area: Make sure your work area is clean and free of hazards. This will help prevent accidents and ensure a smooth polishing process.
Polishing Tips and Precautions for Angle Grinder

1. First rough and then fine
Two-stage polishing process
Polishing is generally divided into two stages: rough polishing and fine polishing.
Rough polishing: This initial stage uses a polishing pad with a higher roughness to effectively remove dust, burrs, and imperfections from the surface of the material. The goal is to prepare the surface for the finer stages of polishing.
Fine polishing: After rough polishing, switch to a finer polishing pad. The focus of this stage is to achieve a smooth surface with high gloss. The transition from rough to fine polish is critical to obtaining the best results.
2. Pay attention to the operation method
Correct technology
Angle and speed: Keep the angle grinder perpendicular to the workpiece surface. This ensures even contact and prevents uneven wear on the polishing pad.
Lay flat: Place the polishing pad flat on the surface of the workpiece. Gradually move the angle grinder at a slight angle so that the center point of the polishing pad is in contact with the surface. This technology helps distribute pressure evenly and enhances the polishing effect.
3. Pay attention to polishing time
Time management
Avoid over-polishing: Polishing for too long can damage the surface of the material. It is generally recommended that the polishing time for each section of the workpiece should not exceed 2 minutes.
Monitor progress: Check the surface regularly during the polishing process to ensure you are achieving the desired results without overdoing it.
4. Keep it clean
Maintenance after polishing
Clean the workpiece surface: After polishing, clean the workpiece surface thoroughly to remove dust or debris generated during the processing. This helps prevent contamination during subsequent polishing stages.
Clean polishing pads: After use, clean polishing pads to remove any residue. This will help maintain its effectiveness for future polishing tasks.
-
Online service
-
Official wechat
account
-
QQ:40933769
-
E-mail:
sales@z-lion.com
Online service
Please feel free to give your inquiry in the form below. We will reply you in 24 hours.

